Sunday, December 6, 2015
Coconut Ice Cream
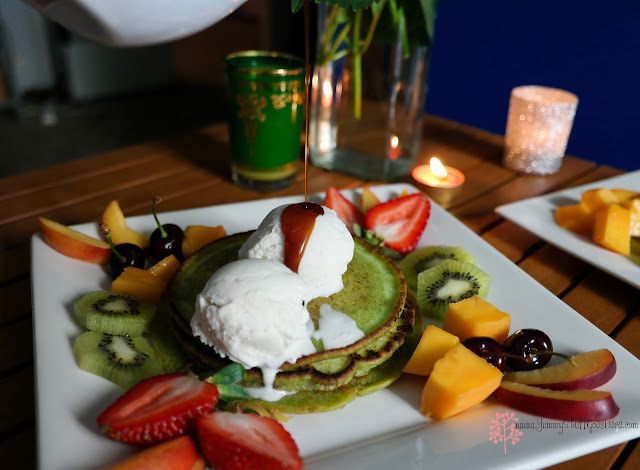
Homemade Coconut Icecream with Pandan Pancakes. Here is the recipe for a non cooked coconut icecream. Pancakes are just your basic buttermilk pancakes with pandan extracts for flavouring. The dressing is thick gula melaka aka cooked palm sugar syrup. It is commonly used in most Asian desserts.
Ingredients
2-3 cans of coconut milk
300 ml of full heavy cream - I added this for smoothness and creaminess
1 very tiny pinch of sea salt (optional)
1 1/2 cup of caster sugar
1 tablespoon of natural coconut essence (non alcohol) REMEMBER: Alcohol will not freeze!
**You can add any non alcoholic essence flavouring you like ** ie if you use rum and pineapple, it becomes a pina colada icecream!
Method
1. Mix in Blender till smooth then transfer to churn in ice cream maker for best result.
2. If you don't have one, pour into container and put in freezer, then every hour, remove and whisk and put back in freezer. The idea is to put air into it, to make it light, less dense and repeat as required.
3. Eat your icecream smile emoticon Note: it can be served, with all kinds of toppings or desserts. I'm saving mine for pandan pancakes!
Thursday, November 26, 2015
The Bended Elbow
Today we bid farewell to the artist formerly known as Boo Radley, who is moving to Melbourne for a new job and to be with his gal. Lunch was held at The Bended Elbow bistro pub in Albury downtown. This place is a pub with an amazing beer garden on the top floor. I was in love!! This is what I dream for my backyard to be. There were plants everywhere.
As with any pub lunches, we ordered and paid at the counter and the wait staff brings out our food to the table when it's ready. The menu was varied, catering to appetites big or small. You can have a steak if you are famished or some appetisers like sliders which will tie you over till dinner time, if you are not hungry.
I had the Cajun Chicken Salad, it was a very simple and basic salad with the smallest amout of mango that I almost cried! It took me all week to decide what to have and I chose that because I wanted some mango salad with my chicken. You can't really call that a salad! It's more like a garnish!
Am I right?
My friends had the pork belly, chicken parmagiana, steaks , the usual standard of pub meals. Golly gosh, a lot of my meal choices lately had been a hit and miss. This upcoming Xmas luncheon had better be good. I am so sick of mediocre! (Our last outing at The Beer Deluxe was the same, dissapointing.) This place was definitely a step up from there. At least, The Bended Elbow had a gorgeous beer garden and the wait service was good. No meals were late or missed.
I wonder if there are ninety nine beer bottles up there???
Labels:
Australian,
Bistro meals,
Desserts,
Reviews,
Travel
Saturday, November 21, 2015
Lychee Fruit Popsicles
I was inspired by my foodie friend Lorraine's post Summer Popsicles. It has been stinking hot in Wagga Wagga with the temperature reaching 41 degrees, so this recipe from her was Godsend. Please click on the link to follow her recipe. As I had no Pimms in the house, err.. guilty as charged..... hick! I had to improvised. I decided to use my Lychee syrup and some sparkling Soda water and Angustura bitters. I was a little dissapointed of the lack of alcohol in it but meh.... it will do, for Lychee fruit popsicles.
- Cut up some summer fruits and put in popsicle container/s.
- Make your own favourite drink mix. (mine was lychee, soda, angustura bitters)
- Pour it into container.
- Freeze overnight in your freezer.
It really is that simple.
Sunday, November 15, 2015
Blueberry Cheesecake
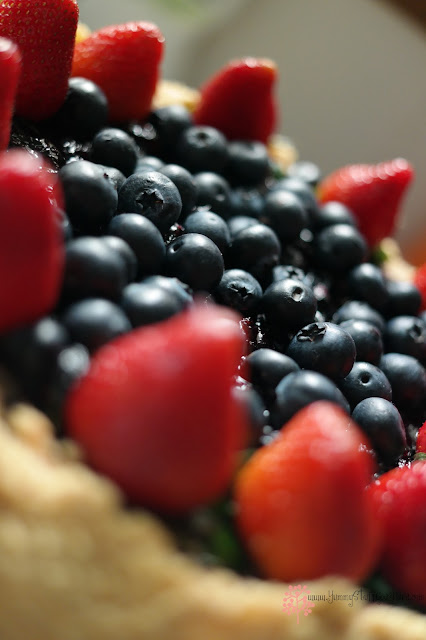
This is a very simple baked blueberry cheesecake recipe from Taste.com The original recipe is Baked Lemon and Blueberry cheesecake however, I had adapted the recipe to suit my taste and preference. You see, I prefer my cheescake baked so this recipe was quite handy.
Adapted ;)
Ingredients
375g cream cheese, softened
3/4 cup caster sugar
1 teaspoon lemon zest used in making coulis
2 tablespoons lemon juice used in making coulis
1 teaspoon vanilla extract
3 eggs
1 1/2 cups Coles Brand Australian Fresh Frozen Blueberries
Icing sugar, to dust (optional)
Fresh blueberries, to decorate (optional) I added strawberries
200g
80g butter, melted
Method
1. Preheat oven to 170C (150C fan). Spray side and base of 22cm springform pan with oil. Line base with baking paper.
2. In a food processor, process biscuits until they resemble fine bread crumbs. Add butter and pulse until mixture comes together. Press crumb mixture into base of pan. Refrigerate.
3. Wipe processor clean and add cream cheese, sugar,
4. Bake for 1 hour; the cheesecake should still be slightly wobbly in the centre. Cool completely in oven. Refrigerate overnight.
5. Dust cheesecake with icing sugar and serve with r
Labels:
Blueberries,
Cheesecake,
Dessert,
Food Photography,
Recipe,
Strawberries
Saturday, October 31, 2015
Apple Rosette
The rain brought some relief this weekend after the unusual hot Spring week. Err, so guess what I did on the first cool day that we had this Spring? I had decided to bake.
I had a free weekend and so I thought that I might bake something. I had watched this video on Tips Hero and wanted to give the recipe a try. So basically, it's an apple rosette, slices of cooked apples rolled in pastry to look like roses. It was so pretty!
Watch the video. http://tiphero.com/baked-apple-roses/
I made more than six roses and I mixed up some spiced brown sugar instead of fruit preserves for fillings. So, here is the recipe from the link.
Ingredients:
Here’s what you need to make 6 of your own roses:
-4 apples, cored and halved (leave the skin on)
-Juice from 1/2 lemon
-3 Tbsp fruit preserves ( I used apricot but you can use your favorite fruit)
-2 Tbsp water (plus more for apple soak)
-1 sheet of puff pastry
-Cinnamon, to taste
Instructions:
– Preheat Oven to 375 degrees
– Put apple slices in microwave safe bowl. Fill bowl with water and juice from half a lemon. Use enough water to make sure apple slices are covered by water. Microwave for 3 minutes. This will soften the apple slices and make them more pliable for rolling up.
– Next grab a sheet of puff pastry. Flour your board and roll out the puff pastry enough to make 6 strips at 3 inches wide. I scored and cut mine with a pizza wheel put you can use a knife.
– In a bowl mix your favorite fruit preserves with a couple tablespoons of water. Then spoon out the preserves in the center of the strip of puff pastry.
– Next place the apple slices long ways halfway on the strip. Keep adding slices until you reach the end. Then fold the puff pastry over the bottom of the apple slices.
– Roll up the puff pastry and place in a greased muffin tin.
– Bake the apple roses for 35-45 minutes.
– Pull out of oven and let cool for 5 minutes.
Saturday, October 17, 2015
Fruit and Spice, Penang
The last time I was in Penang, Malaysia, was in 2012 and friends and I visited the Fruit and Spice in Balik Pulau for it's famous Assam Laksa. The owner is Eric Kee and he also has an antique shop within his premises. There were so many items that I would like to own, sadly, my wallet could only afford me, a few bowls of laksa and perhaps some pie tees. These are old Peranakan food favourites, you may know them as Nyonya cuisine.
It's been too long and I am yearning for my friends and Malaysian food again. Foods are best shared with friends and family, and I am missing them a great deal.
Here are some info of the shop:
Fruit and Sprice
Eric Kee
www.fruitnspice.com
202B, Jalan Sungai Pinang
11010 Balik Pulau, Penang.
Email: info@fruitnspice.com
Photo credit : Lin Milne
Photo credit : Lin Tan
Need to start planning for my next getaway to this great island I call home. Home is where the heart is. Or in my case where the tummy is...
Saturday, September 12, 2015
Cherry Blossom Macarons
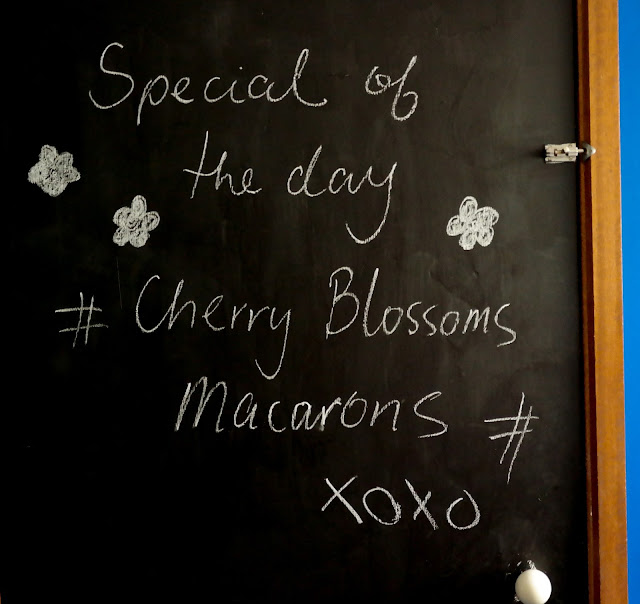
Hi there all, it's spring time in Australia and I can't helped but be inspired to make some Cherry Blossom Macarons. I have been wanting to make these for quite some time, ever since I got hold of a cherry blossom flavouring last year. Now with the cherry blossoms in bloom, it's the perfect time to do this blogpost.
Now this recipe is a basic French Macaron recipe which I had learned from a Macaron making class. You can adapt this recipe to any flavours and colouring to suit you by flavouring the ganache and as for the shells, you can use any colouring. Do try to use gel or powdered colours as liquid colouring will change the texture of your shell.
One of the secret to a successful macaron making is, that you have to aged the egg whites. This means that you store your eggs whites up to a week in the fridge to liquify it, the breaking down of the albumen does makes a difference, to a pass or fail. :)
Ingredients:
120g liquified egg whites
125g Almond meal
210g pure icing sugar (NOT Icing Mix)
90g caster sugar
- Pulse gently in a blender, mix icing sugar and almond meal till smooth, do not let it get hot.
- Then sift. Set aside
- Beat egg whites to a soft peak then add caster sugar till dissolved
- Fold thru almond meal mix with meringue
- Now pipe to a round shape button and tap tray to ensure no air bubbles trap inside.
- Let it sit for 40 minutes to form skin.
- Bake at 130 degrees for about 15 minutes, check your oven, don't bake them too hot, adjust accordingly.
Fillings:
- Place the white chocolate in a medium bowl.
- Bring the cream to a boil over medium-high heat in a small saucepan and pour it over the chocolate.
- Allow the mixture to rest for about two minutes, then stir until the mixture is smooth and the white chocolate is completely melted.
- Allow to cool for about five minutes, then add a few drops of cherry blossom essence. Cover the bowl with foil and refrigerate it until the mixture thickens.
Sunday, August 23, 2015
Chocolate cake
My little one is all grown up but he will always be my baby, even if he turns 21 this week. Prior to making his Chocolate cake, I had to get his approval as he is a tad fussy with his foods. I was not allowed to make buttercream frosting, use any fresh cream or god forbid that I put any fruits on it, even if it was choc coated strawberries. I did get an okay for salted caramel sauce. I was not allowed to use thick caramel from cooking sweet condensed milk. Who doesn't like sweet condensed milk? I secretly put this in his Milo and he loves it! Shhhhhh! So my revenge was, going overkill on the chocolate decorations, toppings, heheheh.
The salted caramel was prepared earlier, I always have a batch ready made for any occassion. I learnt to make this at a previous macaron class with FoodIam.
So here is the simpole recipe which I followed from Taste.com. There are loads of recipe there but I am sticking to the classic simple recipe for the fusspot ;)
http://www.taste.com.au/recipes/20016/classic+chocolate+cake?ref=collections,top-10-chocolate-cake-recipes
Ingredients
- 1 1/3 cups (200g) plain flour
- 2 tablespoons cocoa ( I used Organics Greens Cocoa, they are the best I know)
- 1 teaspoon baking powder
- 1/2 teaspoon bicarbonate of soda
- 200g good-quality dark chocolate, chopped
- 225g unsalted butter, softened, chopped
- 1 cup (220g) caster sugar
- 1 teaspoon vanilla extract
- 4 eggs
- 1/2 cup (125ml) milk
- Chocolates for decorations
- 1 tsp of glucose (I add this instead of butter to ganache for shine)
Method
1. Preheat the oven to 160C. Grease and line a 24cm round springform cake pan.
2. Sift the flour, cocoa, baking powder and bicarbonate of soda into a bowl. Set aside.
3. Melt the chocolate in a heatproof bowl set over a pan of barely simmering water (don't let bowl touch water). Cool slightly.
4. Beat butter and sugar with an electric mixer until light and fluffy. With beaters on medium speed, add vanilla, then add eggs, 1 at a time, beating well after each addition. Pour in cooled chocolate and beat until well combined. Beat in a third of sifted ingredients, followed by a third of the milk. Repeat until all ingredients are incorporated, beating until smooth.
5. Pour mixture into the pan and bake for 45-55 minutes until risen and a skewer inserted in the centre comes out clean. Cool in the pan on a rack for 10 minutes, then invert onto rack to cool completely.
6. To serve, spread the ganache over the top and sides of the cake using a hot palette knife, then decorate with chocolates.
7. To make chocolate ganache: Melt 150g chopped good-quality dark chocolate with 125ml heavy double cream. I heat my cream, stop prior to boiling point and pour over chocolate melts and leave it for few minutes to melt. I then stir them up and added a teaspoon of glucose to make it super glossy. I have heard that you can also add butter.


