Showing posts with label Recipe. Show all posts

Sunday, June 5, 2016

Azuki Matcha Terrine

This recipe is from TasteMade

As I didn't have any heavy cream at home, I had substituted it with coconut cream instead. Let's hope it is not a disaster and I get an interesting flavour with a hint of coconut!


Please head over the TasteMade website on the link above. I love that website as their video presentation is always so easy to understand.

Ingredients

25 grams matcha powder, sifted
200 ml  heavy cream  coconut cream
90 grams white chocolate
30 grams butter
1 egg yolk
1 whole egg
1 tbsp flour, sifted
100 grams prepared sweetened azuki beans  I used can of red bean paste from Asian grocer.

Method
  1. Heat heavy cream in a saucepan over low heat until simmering. Turn off the heat. Add the white chocolate and butter to melt. Mix until smooth.
  2. Combine flour, matcha powder, whole egg and one egg yolk and mix well.
  3. Line a slender pound cake tin with parchment paper. Layer adzuki beans on the bottom, making sure it's nice and flat. Pour in the matcha mixture. Make a water bath and bake for 30 minutes at 150 degrees C. Take out of the oven and let it cool completely. Refrigerate until chilled.
  4. Take out of the mold and slice into individual portions. Serve with chipped cream and a sprinkling of matcha powder if desired.
The verdict:

No coconut hint was detected in ref to my using coconut cream instead of heavy cream. It is an extremely rich dessert and this is the one time, I'm actually liking the bitterness of the Matcha because it actually complemented the sweetness of the red bean paste. This dessert is truly outstanding and I don't mean mine, just go make one and you will know what I mean! So yummy!! You should only serve it in one small square as it is very rich and creamy. 


Sunday, November 15, 2015

Blueberry Cheesecake


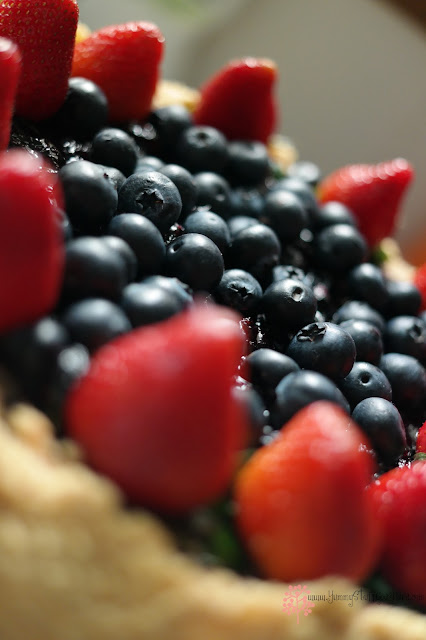
This is a very simple baked blueberry cheesecake recipe from Taste.com The original recipe is Baked Lemon and Blueberry cheesecake however, I had adapted the recipe to suit my taste and preference. You see, I prefer my cheescake baked so this recipe was quite handy.


Adapted ;)
Ingredients
375g cream cheese, softened
3/4 cup caster sugar
300ml cream  did not use, seriously, I forgot!
1 teaspoon lemon zest used in making coulis
2 tablespoons lemon juice used in making coulis
1 teaspoon vanilla extract
3 eggs
1 1/2 cups Coles Brand Australian Fresh Frozen Blueberries
Icing sugar, to dust (optional)
Fresh blueberries, to decorate (optional) I added strawberries 
200g Scotch Finger biscuits   Used biscuits crumbs from a packet
80g butter, melted

Method
1. Preheat oven to 170C (150C fan). Spray side and base of 22cm springform pan with oil. Line base with baking paper.
2. In a food processor, process biscuits until they resemble fine bread crumbs. Add butter and pulse until mixture comes together. Press crumb mixture into base of pan. Refrigerate.
3. Wipe processor clean and add cream cheese, sugar, half of the cream, zest, juice and vanilla. Process until smooth and creamy. Add eggs, one at a time, and process in short bursts. Pour into pan, scatter over blueberries and stir gently to distribute evenly.
4. Bake for 1 hour; the cheesecake should still be slightly wobbly in the centre. Cool completely in oven. Refrigerate overnight.
5. Dust cheesecake with icing sugar and serve with remaining cream, whipped, and fresh blueberries.


Sunday, May 26, 2013

Purple Power

Purple Power

So I am have been juicing for weeks, I haven't lost any weight that I can see. However, I am definitely feeling the better for it. I still have my cold/flu. Who has a cold for 3 weeks? I am so over the coughing already. It's annoying. Everytime I coughed too hard, I have to run to the loo to pee. Oh, can I say pee online?  I have noticed that I do not have any symptoms of IBS (Irritable Bowel Syndrome).

Purple Power

This week, we went green and now purple. The green drink last week, was just celery, green apple, spinach, broccoli, kale. I only took instagram photos if you are interested, it My Instagram

For the Purple Power, I looked for all most red and blue and purple veges and fruits. I didn't buy blueberries though because it was so expensive for a punnet. $7!! Ouch!! Now make sure you always always wash your veges and fruits, because you are drinking it raw, get rid of any pesticide. At least with cooking, we know they will be well and truly dead. But you should always wash your foods anyway.

Recipe:

2 purple carrots
1/4 head of red cabbage
1 beetroot
1 bunch of red grapes
1/4 lemon for the zing!

If you can afford it, throw in the blueberries!

Purple Power

Sunday, February 24, 2013

Chinese New Year Peanut cookies

I have so many favourites when it comes to Chinese New Year snacks. I love these especially,
  • Kuih Kapit ( Love Letters) 
  • Kuih Loyang 
  • Peanut cookies
  • Pineapple jam tarts
Just to name a few here, what are yours?

I have never made peanut cookies before so Charmaine gave me, her recipe from her blog. I want to share a couple of easy recipes with you here. I also found another recipe from Susan of http://www.chocolatesuze.com. You will need to click on the link to get to their blog.

With both recipes to study from, I still manage to forget the grinding of castor sugar...LOL. Next year, will use icing sugar. Never mind, my personal stash, it's alright, still yummy though!

Will be stuffing my face with this while I watch my korean dramas ;)

Peanut cookies

Peanut cookies


Saturday, February 23, 2013

Asian Beef in Lettuce Cups

IMG_6325

Hi all, yours truly has been very lazy since Chinese New Year and all. Sadly, it was not because I was busy with baking or cooking a banquet, truth be told, it was that damn CANDY CRUSH game on Facebook. I was hooked, lined but I sunk, coz I totally suck at it and I gave up! So hopefully, I shall return to my blogging soon as.

This recipe is a very easy and tasty meal to prepare, adapted form the sang chow bow, instead of mince, all you need is some premium beef steak, a lettuce head and some marinades that can be easily found in your pantry. I shall have you eating these, in no time at all, with your fingers, hooking into the beef wrapped in lettuce. It is basically like an Asian Beef Tacos ;) so it can get very messy! I put my lettuce cup in a bowl so I can show off my Japanese bowl, isn't it pretty?

Number of serving: 1 steak per person, you can have as many you want. There are no rules in my kitchen! For this post, the marinades are for one steak, increase the amount of ingredients accordingly to your number of servings.

Ingredients
  • One Iceberg lettuce head
  • One prime rump cut steak or porterhouse with fat trimmed off
  • 2 tablespoon cooking oil
  • 1 teaspoon minced garlic
  • 1 tablespoon sweet soy sauce
  • 1 tablespoon hoisin sauce
  • 1 teaspoon chilli powder. ( I normally used Indian chilli powder or Thai brand, extremely hot)
  • A dash of grounded black peppercorns
  • A sprinkle of salt to taste - optional
  • A drop of sesame oil for flavour, and to tease your senses!
  • Coriander leaves for garnish.
  • Chopped peanuts or sesame seeds for garnish, whatever you can find in your pantry.
Method
  • Wash the lettuce head in salty water, this will remove all alien inhabitants. Rinse well.
  • Break off lettuce cups and pat dry, taking care not to break or damage any cups.
  • Set aside in bowls or plates.
  • Marinade steak/s in the ingredients. (soy, garlic, hoisin, black pepper, salt- optional)
  • Leave marinated steak alone for half hour.
  • Break out the skillet from your cupboard and put her on high heat on the stove, once the skillet is hot enough, put the steak on, a few minutes each side, just to seal off the steak, if you like your steak rare. Or you could barbeque the steaks and sliced them after.
  • Once your steak is cooked, rare, medium or done (urgh!), you'll need to slice it and put them into the lettuce cups.
  • Dress them up with your garnish of choice, whatever you can find in your pantry. Your kitchen, no rules.....it can be those packets of crispy fried noodle snacks, or crushed peanuts or roasted sesame seeds and a sprig of coriander leaves to make it pretty!

IMG_6310

IMG_6308

Saturday, January 12, 2013

Chinese New Year Pineapple Jam

The making of the Pineapple Jam for pineapple jam tarts prior to Chinese New Year. A very short photo blog.

Pineapple Jam


Ingredients

  • 2 Fresh pineapple (chopped and blended) I prefer Queensland Gold, very sweet! 
  • 2 cups of granulated sugar
  • I cinnamon stick (Personal preference) 

Method

  • Put all ingredient in pan and cook till liquid is gone ( like a reduction)
  • Leave to cool
  • Store in sterile jar, can be kept for weeks, months in freezer till ready for jam tarts.

Monday, December 31, 2012

Banana Bread with Walnuts

Banana Bread

The year is almost over. My bananas are getting old... LOL. I mean literally, no encrypted messages here. I have 5 bananas ripe as anything. Should I throw it out? Never, there are lots of things you can make using bananas. I love banana cake/bread with walnuts. It's sweet and nutty. You can make banana icecream, smoothie, muffins or even banana fritters to serve with icecream.

SAM_1024

For today, I am just happy to replicate this recipe with the addition of nuts..... I love nuts, I am nuts! Can't wait for it to come out of oven when I can slap some more butter on the thing... YUMS! Recipe is from Simply Recipes. I love that blog, so many easy recipes. One of my favourite blogs to follow.

Prep time: 5 minutesCook time: 1 hour

INGREDIENTS
3 or 4 ripe bananas, smashed
1/3 cup melted butter
1 cup sugar (can easily reduce to 3/4 cup)
1 egg, beaten
1 teaspoon vanilla
1 teaspoon baking soda
Pinch of salt
1 1/2 cups of all-purpose flour

METHOD
No need for a mixer for this recipe. Preheat the oven to 350°F (175°C). With a wooden spoon, mix butter into the mashed bananas in a large mixing bowl. Mix in the sugar, egg, and vanilla. Sprinkle the baking soda and salt over the mixture and mix in. Add the flour last, mix. Pour mixture into a buttered 4x8 inch loaf pan. Bake for 1 hour. Cool on a rack. Remove from pan and slice to serve.
Yield: Makes one loaf

Add walnuts

Banana bread

What a beauty!

Banana Bread loaf

So there you have it, one very easy recipe to follow with added nuts for me ;) NOMNOMNOMS!

Saturday, December 15, 2012

Brandied Cranberry Cookies

SAMSUNG CSC
My Leaning Tower of Cookies
Another baking day this weekend, I am having a lot of fun getting back in the kitchen, just baking cookies for Xmas. I love the smell of baked cookies in the house. Freshly baked warm buttery cookies for arfternoon tea, what could be better? I found this recipe by chance when visiting sitemeter, Simply Recipes was featured on the site and I gotta say, love this website. It has so many recipes of cookies to choose from. Love it!

Recipe from http://www.simplyrecipes.com/recipes/brandied_cranberry_white_chocolate_chip_cookies

Ingredients
  • 1 cup of brandy (to soak the cranberries in, then saving 1 1/4 teaspoons of it for later)
  • 1 cup of dried cranberries
  • 1 cup (two sticks) of butter, room temperature
  • 3/4 cup of granulated sugar
  • 3/4 cup of lightly packed brown sugar
  • 2 eggs, room temperature
  • 1/2 teaspoon of vanilla extract
  • 1 teaspoon of baking soda
  • 1 teaspoon of salt
  • 2 1/4 cups of all-purpose flour
  • 1 cup of white chocolate chips
http://www.traditionaloven.com/conversions_of_measures/butter_converter.html
Two sticks is equal to 226gram

cranberry cookies
Method
  • Put the cranberries in a wide and shallow bowl, pour in brandy. Enough so they're are drowning. Just keep swimming my babies!!! Cover and place in the fridge for an hour or more. Afterwards, place a colander over a bowl and pour the cranberries and brandy through, putting the cranberries and the brandy they soaked in aside.
  • Preheat oven to 375°F. Beat the crap out of the butter until it's light and fluffy. Add the sugars and beat again until light, fluffy and well incorporated.
  • Add the eggs, vanilla extract, and add 1 1/4 teaspoons of the brandy that the cranberries soaked in (as for the rest, I suggest popping it in a glass and topping it off a bit for yourself). Beat well until light and fluffy. Scrape down the sides of the bowl midway through to ensure even mixing.
  • Sift together the flour, baking soda, and salt, then add to the mixture a bit at a time, beating until just mixed. Fold in the brandy soaked cranberries and white chocolate chips. Let them chill out for 15 minutes in the fridge to commiserate their fate. 
  • Line a baking sheet with parchment paper (a baker's best friend) and place rounded spoonfuls down on the sheet. Bake at 375°F for 10-12 minutes or until golden brown. Let cool for a minute, then transfer to a wire rack to cool completely.
SAMSUNG CSC

SAM_0964 (1024x553)

My kitchen smells lovely and I am slightly tipsy, it's all good! Gotta love this recipe :) Happy Holidays folks. Just keep on baking!! Errr, okay I nearly forgot to mention that I threw in some pistachio in the dough... heeehehe. That's also good for ya, puts hair on ya chest!

Saturday, December 8, 2012

Gingerbread Men and Xmas cookies


Gingerbread Xmas tree

Gingerbread men and cookies


Gingerbread Men and Xmas cookies

Ingredients
  • 150g Western Star unsalted butter, cubed
  • 1/2 cup golden syrup - I used molasses instead of golden syrup!
  • 1/2 cup brown sugar
  • 1 tsp bicarbonate of soda
  • 3 cups plain flour
  • 1 tbsp ground ginger
  • 1 tsp ground cinnamon
  • 1/2 tsp nutmeg
  • 1/2 tsp ground cloves
  • 1/2 tsp baking powder
  • 1 egg, lightly whisked
  • Writing fudge and rainbow chocolate chips, to decorate
Method
  • Preheat oven to 180C. Line two large oven trays.
  • Place butter, golden syrup and sugar in a saucepan over medium heat. Cook, stirring, until sugar dissolves. Bring to the boil. Remove from heat. Add bicarbonate of soda and stir to combine. Transfer to a large heatproof bowl.
  • Set aside to cool.
  • Sift flour, ginger, cinnamon, nutmeg, cloves and baking powder over butter mixture. Add the egg and stir until combined. Turn on to a lightly floured surface and gently knead until smooth. Divide dough into two portions. Shape each portion into a disc and cover with plastic wrap. Refrigerate for 45 minutes.
  • Roll one portion between two sheets of baking paper until 5mm thick.
  • Using 6-7cm pastry cutters, cut shapes from dough, re-rolling scraps. Place on the lined trays, 3cm apart to allow for spreading. Repeat with remaining dough.
  • Bake in the oven, 1 tray at a time, until just firm to touch.
  • Remove and set aside for 5 minutes to cool before transferring to a wire rack to cool completely.
  • Decorate using writing fudge and chocolate chips.
Recipe: taste.com.au

Gingerbread Xmas Tree
This one is sitting on my mantlepiece ;) Hands off Santa!!!

Friday, December 7, 2012

Who's Dreaming of White Christmas?

WHITE CHRISTMAS

White Xmas

Recipe from Woolworths Supermarket catalogue

Ingredients

  • 3 cups crispy rice cereal
  • 2 cups dessicated coconut
  • 1 cup sultanas
  • ½ cup red glace cherries, halved
  • ½ cup blanched almonds, roasted, chopped coarsely
  • 395g can NESTLE Sweetened Condensed Milk
  • 100g Copha white vegetable shortening, chopped coarsely
  • 100g Nestle White Melts plus ½ cup extra drizzle later.


Fruit Mixes

SAMSUNG CSC

Method

  • Grease and line an 18cm * 28cm lamington pan. Combine crispy rice cereal, coconut, sultanas, cherries and almonds in a large bowl.
  • In a small saucepan combined Nestle Sweetened Condensed Milk, Copha and Nestle White melts, stir over low heat until mixture is melted and smooth. Stir in dry ingredients. Press mixture evenly into prepared pan. Refrigerate until set.
  • Place extra Nestle White Melts in a small microwave safe bowl. Microwave uncovered on Medium for 1 minute. Stir. Repeat process in 30 second interval until method. Drizzle Nestle White over slice. Cut in square to serve, Store covered in refrigerator.


White choc mix

White Xmas Mix


SAMSUNG CSC

Sunday, December 2, 2012

Strawberry Icecream

IMG_3365
Hi all, sobs.....Summer is here and she has been a scorcher, with her unwelcome heatwave. I must admit, I am not a summer person, I detest the heat and the humidity and I would hibernate if I could. Every summer I would curse and swear, that I would move to Antartica but it never happens. Maybe I should learn to ski and go hide in the snow somewhere.
But enough whining, here is one of my survival tip for summer. Eat lots of icecream. Invest in an ice cream machine, you can make sorbets, gelatos, yoghurt, and icecream and even slushies if you want. It is the perfect treats for those hot summer days and nights. However, for this post, I am going to share a very basic icecream recipe for the beginners.

Recipe for Homemade Strawberry Ice cream.  
It is very important that you read the manual of your ice cream maker. Please put the freezer bowl in your freezer overnight prior to making ice cream. You need to do this before the day of making your icecream. The bowl needs to be freezing cold, when it is churning your mix.
Ingredients
•         I to 2 small punnet of fresh ripe strawberries, stemmed and sliced, reserve a few for garnish.
•         1 freshly squeezed orange or mandarin. You may use 2 teaspoon of lemon juice as an alternative.
•         150 gram of caster sugar
•         600 ml of thickened cream (double cream) also known as cooking cream.

IMG_3368

Method
•         Reserve a few strawberries for garnishes.
•         Chop up the rest of the strawberries with added caster sugar, put it in a blender to process. Once this is done, put the content into a mixer, pulse the strawberry with the heavy cream until it mixes in. Use a hand mixer if you haven’t got a standalone.
•         Transfer the mixture into the freezer bowl, turn on the ice cream maker and let it mix until thickened, about 20 to 25 minutes.
•         Five minutes before mixing is completed, add some chopped up strawberries and let it mix in completely. This is for the fruity bits in the ice cream. The ice cream will have a soft, creamy texture but not runny. If you prefer your ice cream a  little firmer, transfer the ice cream to place in freezer for about half hours. Remove from freezer about 15 minutes, garnish before serving.

IMG_3370

IMG_3390

And that is all. Stay cool and don't forget to slip, slop and slap if you go out in the sun! 

Sunday, August 12, 2012

Salmon and Black Bean Fried Rice


Hello Yummy Stuff Goes Here readers, and thank you Jackie, for so kindly inviting me to your lovely blog and giving me the run of your virtual kitchen. My name is Denise and I blog at Singapore Shiok. I have not known Jackie for long, but reading her posts paints a picture in my mind, of a warm, jolly and generous spirited person.


Apart from blogging, I also write cookbooks, the second of which has just recently been published, develop recipes and have had my recipes published in a number of local magazines in Singapore. I have been circulating in and around both commercial and domestic kitchens of one form or another for about 25 years now, and that does not even include my veritable grandmother's kitchen, where I grew up being surrounded by and saturated with all things food and kitchen related.


Above anything else, I am first and foremost, a mum of 3 energetic, always hungry and heartwarmingly appreciative boys, who think that I am "the world's best cooker". Suffice it to say, that I am perpetually in the kitchen, stirring or baking something up, to fuel my boys' batteries. As any mother of teenagers will know, the CPU of any growing boy is his stomach; keep it filled and he will be happy, leave it empty and you will have a sore headed bear to contend with.


My boys are fairly typical ; they want their grub plentiful, they want it tasty but uncomplicated and they want it 10 minutes ago. This is perfect throw together, all in one dish, for when you need something good to feed hungry, impatient boys. And, as any blogger mum will know, it's  way too easy to get caught up in writing posts, styling your dishes, going after that money shot and sorting through and editing dozens and dozens of photos, then finding yourself faced with a hungry, angry mob because lunch was 40 minutes ago but the dining table remains bereft of anything edible.


I was having such a day, writing then poring over photos for an upcoming post, when my two younger boys, done with school for the day, galloped in gasping from the heat, and ravenous.  As their eyes scanned the  table and countertop, I could hear the accusation in their voices when they asked, "Hi mum! What's for lunch??!" *yikes*


I flew about the kitchen, dumped cold rice, black bean paste, and a fat salmon fillet on the kitchen counter then hurriedly peeled and chopped an onion. Thankfully there were some eggs in the fridge and a forgotten cucumber, the only vegetable left rolling around in the huge and near empty crisper, save for a couple of wrinkly chillies. I really should get an assistant.....


So you see, I wasn't trying to be clever, with my 6 ingredient recipe - I really didn't have much of anything left in the fridge. Still, a skimpy recipe doesn't necessarily mean it will be any less tasty than one with a dozen or more ingredients. The salmon and black beans are both packed with flavour, onions add natural sweetness and the generous amount of black pepper kicks up the heat just enough, without overwhelming the palate.


The outcome from such a hurriedly thrown together and scanty recipe so surprised me, that I decided to cook it again and photograph it for a post. Fried rice has saved me from a domestic mutiny many, many times and it always amazes me how my boys (hubby included) never seem to tire of it, so I keep coming up with versions, based on what I have on hand at any given time.


This particular version will probably remain my favourite for a long while as it's so easy, tasty, nutritious and looks so pretty because of the peachy tones of the salmon. It was so good, that Joseph, my second boy, was extremely reluctant to share it with his younger brother, so I forfeited my share, to keep the peace. Just writing about it makes me want to cook it again. It has become a family favourite and I hope you will enjoy it as much as we do.

It's been such a pleasure being Jackie's guest and writing for all of you lovely Yummy readers. Thank you again Jackie, for so kindly inviting me.


Salmon and Black Bean Fried Rice

Prep 15 mins      Cook 15 mins        Serves 2 - 3


1 large red onion, peeled and coarsely chopped (if you only have white or yellow onions, use that)
2 tbsp garlic black bean paste (or to taste)
2 large eggs
4 level cups cold cooked rice, raked with a fork to loosen grains
250 g salmon fillet, skinned or with skin left on, cut into 1.5 cm (about 1/2 in) cubes
1 1/2 tsp black pepper (or to taste)


Heat 3 tablespoons vegetable oil (sesame is nice for this, if you have it) until moderately hot and fry the onion until transparent and beginning to brown around the edges

Stir in the black bean paste and cook for 1 - 2 minutes or until quite dry.

Break in the eggs and leave until half set then scramble thoroughly.

Add the rice and turn up the heat to high. Stir well until rice is coated with black bean paste and everything is well mixed.

Push rice to the side and add a little more oil to pan. When oil is very hot, add the salmon cubes. Allow to brown then turn the cubes. Keep turning and cooking until no longer pink. This should only take a few minutes. Don't overcook the salmon, which should still be moist and flaky inside.

Combine the rice and salmon and stir well to mix. Add pepper and stir. Turn off heat and taste. Add salt if necessary, though I found I didn't need any salt because the bean paste is quite salty. Dish out, garnish with sliced cucumber and chillies if desired and serve immediately.

******************************************************************************

Hi all, this is Jackie

Denise, thank you so much for that lovely intro and for writing a guest post here at Yummy Stuff Goes Here. I have been a fan of yours for ages and I am a great believer in quick and easy meals. 

Today , I am giving away a copy of Denise's latest cookbook, "Mum's not Cooking". She has personally signed it. 

This is not a game of chance. Just sign on to be follower on this blog site, you will need a Google account to connect as a Friend and leave me a comment on this post. Tell us what quick easy meals you have conjured up. The most interesting and creative comment wins. 


denise

Denise, once again, thanks for the guest post and as always, you are awesome. Superb photography and love your post. So simple and absolutely delicious looking!

Sunday, July 29, 2012

Beef Short Ribs

Confession, I am in love with the beef cheeks cooked in "something something" served at Movida Aqui in Melbourne. Today I am trying to replicate the tenderness of the beef. I am using ribs instead of beef cheeks. Okay, I am old, I forgot the name of the sherry or liquer they used.

So, I bought myself some short ribs from Coles, it has eight pieces of short ribs inside and a packet of sauce. If you have a slow cooker, you should follow the instructions on the packet and let it cooked away for six hours.

IMG_5967

As for me, I don't own a slow cooker. I do have a pressure cooker though. I googled and learned that, yes, there are others who have cooked their short ribs in a pressure cooker. Sweet!!! That's is excellent news for me. I don't have the patience for a slow cooked meal, six hours...OMG! That would be too long! I would die of starvation by then.

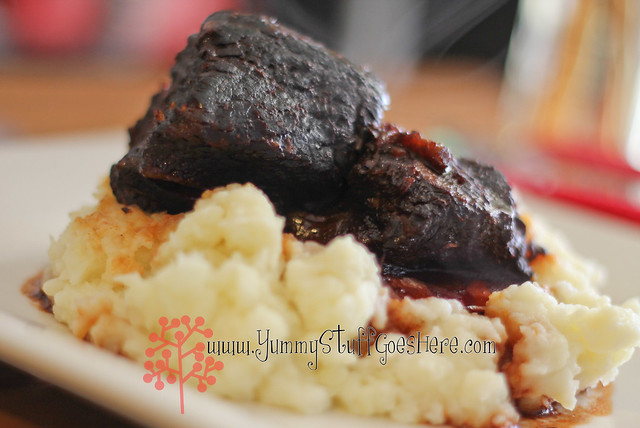
So I threw in the pieces of ribs in the pot, and added the sauce. Then I improvised, I chopped some French Shallots and carrots, threw them all in. Then, I poured in, half a bottle of red wine. Err, and drank the other half, while the beef was cooking.


In less than an hour, I opened it up, to have a sneak peek at the beef. It's fallen off the bones already! The boy came out from his room and exclaimed, "Gross! What is that smell?" And then he sprayed some air freshener in his room. Bahhhahhahahaha. It was the smell of the beef cooking in wine. At least I know he won't be touching the stuff... the vino cabinet, that is!

By now, I realised that I could not spell to save my life whilst waiting dinner to cook, I was instagramming and tweeting. Such a multi tasker, aren't I?

I had to open a second bottle; as apparently the short ribs were better drinkers than I. Must be the pressure cooker, it reduces the liquid, you see. So I pour the wine to cover over the beef again and left it alone for another half hour.

Meanwhile I also baked some veges and made mash potatoes to go with this dish. At Movida, they use cauliflower puree as a bed to sit the beef cheeks on. Today, I am cooking mashies instead of cauliflower, because the boy will eat the mash potatoes and not cauliflower. Wish there is a boot camp that you can send your kids to, and they come home eating all sorts of veges!


Tada..... not Movida Aqui but still super yummy, all up under $20! Not counting the vino, of course :) Now to go feed my face... before I fall off my chair....slurp! Hick!

Sunday, July 22, 2012

Asian Snapper

I love this dish as a child and still do as an adult. My mum likes to steam fish for healthier way of eating. I, on the other hand, likes mine deep fried. Pretty much everything....fried chicken... fried soft shelled crabs, fried fish... etc..And this is why I am fat!


However, for today, I have decided to do a quick fry then baked the fish in the oven. Deep frying is far easier when you have a deep fryer.  Must get me one of those. Just bear in mind that if you do decide to fry, it can be rather sloppy and messy in a wok or pan.

Ingredients
Serves: 4

  • 1 (approx 700 g) whole snapper, cleaned and scaled
  • 1/2 cup fresh coriander leaves
  • 2 tablespoons oil
  • 2 tablespoons fish sauce
  • 2 cloves garlic, minced
  • 1 teaspoon minced fresh ginger
  • 1 French shallots, thinly sliced
  • 2 small red chillies, sliced
  • I tablespoon of kicap manis (sweet soy sauce)
  • 2 tablespoons water
  • 1 whatchamallit of Buk Choy (chinese greens) 
  • I packet of beansprouts
  • I packet of shittake mushrooms

NOTE:
Extra Ginger thinly sliced and fried
Coriander leaves and fresh chilies for garnish
A few drops of sesame oil to sprinkle on dish before serving


Preparation method

Prep: 30 minutes   Cook: 30 minutes

  1. Preheat oven to 190 degrees C.
  2. Line a roasting pan with aluminum foil.
  3. Stuff the cavity of the snapper with the coriander leaves and set aside.
  4. Heat the oil in a large frypan over high heat until it begins to smoke. Place the snapper in the frypan, and quickly brown on both sides, about 1 minute total. Place the fish into the roasting pan, and sprinkle with fish sauce. Reserve the oil in the frypan.
  5. Bake fish in preheated oven until the flesh flakes easily with a fork, 25 to 30 minutes.
  6. Meanwhile, heat the remaining oil in the frypan over medium heat. Fry the garlic and ginger and shallots, removed when crunchy
  7. Add kicap manis and water. 
  8. In a wok, stir fry the Buk Choy, mushrooms and beansprouts on high heat for a few minutes.
  9. Place the stir fried veges on a plate and rest your fish on top of the greens. Pour the sauce over the snapper, and garnish with extra coriander leaves to serve.
  10. Sprinkle sesame oil on the dish. The smell of that alone will get them running to the table.
  11. Serve with jasmine rice.
Happy Eating ;) Just don't look at those fishy eyes and you'll be right!!!


Sunday, July 8, 2012

Fish ball paste

This weekend; after an epic fail in baking, Baking 1: Jackie 0. Feeling very defeated, far worse than when my macaron fail....like seriously guys, how could I get baking a premix wrong??? Pfffttttt! I am officially a baking retard!


So, I've decided to make my own fishballs. The reasons being

  1. I couldn't be bothered with driving to ACT for a Chinese grocery run. I usually buy commercial bulk pack.
  2. It doesn't involved baking. 
  3. It's my favourite snack on stick
  4. It's simple easy recipe, no Science degree required
  5. Oh, have I mentioned? It doesn't require baking, no oven involved!!!
  6. I can have it with my laksas during winter..
  7. And whaddaya know... NO BAKING!!!!!

Preparation time: 20 minutes
Rapid cooking time: 15 minutes
1 lb. white fish (pollock)
1/2 cup arrowroot starch (can be substituted with tapioca starch or cornstarch)
Egg white from 2 eggs
3 ice cubes (about 1-inch square)
1 teaspoon salt
1/2 teaspoon white pepper
Cut up the fish into 1/2-inch cubes. Put all the ingredients except for the ice cubes in a food processor and blend for about two minutes or until smooth. Then add the ice cubes and continue to blend for another three minutes or so. The paste should be very thick with a lot of elasticity. The finished paste should be very smooth with no solid pieces of fish. Scoop the paste into a bowl and refrigerate for about an hour before using.

And what the heck is a pollock??? I used fresh Basa. I like Basa. It is very sweet and white and NON fishy taste. Nothing I hate more than a fish that is overpowering in smells and taste. 


So basically, keep the paste in the fridge for at least an hour. Once it is chilled and firm, or when you are ready to cook them, you can use the paste in just about anything. As you can see, I have stuffed some fish paste into some red chillies like yong tau foo. You can do that with tofu, peppers, beancurd sheets, rolled into balls for noodles, it can be deepfried and serve with chilli sauce or as a snack on a stick. You can even steam it for dimsum. Boil it in soups. It is up to your imagination, the possibilities are endless. 

Mmmmmmm.... fishballs for me ;) Yippppeeeeee
Related Posts Plugin for WordPress, Blogger...